Once you have built your first igloo, you will probably never need the igloo instruction manual again. First of all, the process of building block layers is easy to remember because the product is simple, even if you have not done it in a while. However, we have also made it easy to download our manual below, so it is available for future reference when in the backcountry. Simply load the pdf on your phone and you have the manual anywhere you go.
Tips & Tricks to Get Started
- There is a learning curve to building an igloo which is why it’s important to watch the videos below and read the manual.
- Expect 5-7+ hours to build your first igloo. As you learn how to use the tool, you will get faster.
- In general, the handling and operation of the ICEBOX should be smooth, gentle and well thought out to reduce breaking snow blocks.
- The main ingredient you need is an adequate amount of snow. However, the quality of the snow also affects the building process. Typically, you need the dense snow that lies beneath the top-most layer to build a solid igloo. However, when using the ICEBOX® igloo maker, just pack whatever snow you can gather to chop up and shovel into the ICEBOX® mold to create the perfect block of snow for building.
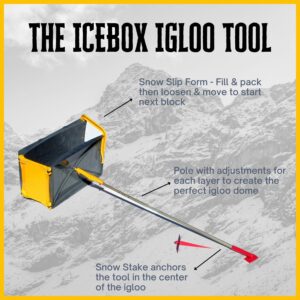
 The ICEBOX slip form attaches to an aluminum pole that adjusts in length for each layer of blocks as the height of the igloo increases. This is what helps you form the perfect catenary curve for a strong and stable igloo.
- The pole is attached on one end to the form and on the other end it is attached to a pivot stake.
- The pivot stake keeps the igloo construction centered to ensure a perfect, circular igloo.
- Prepare the site by flattening the snow and finding the center
- Assemble the ICEBOX® and adjust the length of the pole for the size igloo you want to build (for example, if you want an 8-foot igloo, your pole should be extended to four feet).
- Stake the tool in the center of the site you prepared to ensure your igloo is perfectly circular.
- Build the ramp – The first three blocks are partially filled to form a short ramp. After the ramp, fill the mold full for the rest of the igloo build (hint: check the chart on the inside of the form for specific fill heights based on the size igloo you’re building)
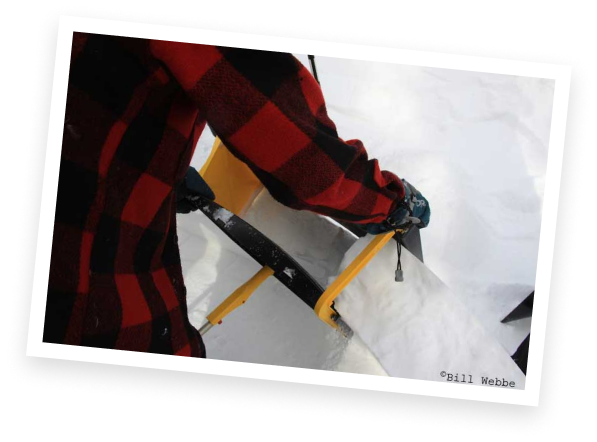
- Finish the first layer – Blocks are created by first setting the clamps (the UBar and Toggle Handle) on the form and then packing snow in the form as it is shoveled in. Pack the snow into the tool with a push to make the snow sinter. This will mold and attach the new block to the adjacent igloo block and previous layer. The snow forms interlocking ice crystals as it is packed causing the blocks to become stable. Once full, release the clamps and shift the form to the left.
- Adjust the pole – After finishing an entire layer, each time you pass the ramp area, adjust the pole to the numbered hole corresponding to the layer you will be building next to create a stable and solid arch. Then repeat the process.
- Remove the Outer Panel – As the wall rises, you can remove the Outer Panel from the mold as it is no longer needed to prevent the snow from falling out. As you finish the dome, you can also take off the yellow panel, leaving only the inside panel. To finish the dome, the pole holds the inside panel in place and snow is packed on from the outside.
- The Doorway -Digging a tunnel at the bottom of your igloo is the best way to keep the cold out but you can also use a cut out a door, if you prefer. Cutting a door out of the wall and adding the cold trap will also hold your heat inside.
Your igloo is now complete and fully functional! For added strength, simply spray some water onto the outside of the igloo. This helps ice to form, thereby holding the igloo even more firmly in place.
ICEBOX Igloo Tool How-To Videos
Igloo Instruction Manuals
The PDF igloo instruction manuals below require Adobe Acrobat Reader to view and print. Adobe Reader can be downloaded from the link below.
English Icebox® manual
English Icebox® manual (bindable)
Finnish Icebox® manual
French Icebox® manual
Book Bindable PDF and Printing Instructions
- Open PDF and select to print.
- When the print page comes up for the igloo instruction manual, select to print in landscape mode.
- Set to print all even pages and select to print in reverse order.
- Flip the paper end to end and print only odd pages.
- Uncheck reverse order and print, this will make it print on the other end.
- Staple in the middle and fold. If everything was done properly, the page numbers should be in the correct order.


