- IceBox Posts, Media and Press
Build Your Own Igloo with an ICEBOX® plastic Form.
“Rewriting the books of winter camping! The tool is lightweight (2,2kg), it can be easily packed on top of a backpack as a box measuring 65x36x8 cm, igloos can be made in any snow conditions in 1,5 to 3 hours without sweat, wet clothes or fatigue. With the tool one can build every time a perfect, self-supporting vault-formed extremely stable and spacious igloo, if there only is 6 inches of snow on ground. The igloo will last through the winter season. The form costs less than a tent…”
Build Your Own Igloo
Story by ERA Finland
If you build your own igloo, you can build a shelter in any condition. However, snow shelters have long been regarded as a piquant special delicacy of winter camping. If you happen to know or find a suitable snowbank for a snow cave, good solid snow for igloo building, or have enough energy to shovel up a big pile of snow for a quinzhee, you will be rewarded a warm, quiet, roomy shelter made of 100% recyclable material, where your breath will not condense on your clothes and equipment.
Unfortunately many winter trek destinations just do not have suitable drifts for snow caves, or hard-packed snow for sawing blocks for a real Inuit igloo. Many campers do not have the skill to build an igloo, and few are willing to toil for a quinzhee. Building a snow shelter is time-consuming hard work. Besides, one gets wet through sweating and of snow melting on knees, elbows, and neck. Thus a tent, being quick and easy to set up, is the standard shelter of a winter camper. Snow shelters are regarded merely as emergency solutions in case of storm or equipment failure.
Snow shelters have long been regarded as a piquant special delicacy of winter camping. If you happen to know or find a suitable snowbank for a snow cave, good solid snow for igloo building, or have enough energy to shovel up a big pile of snow for a quinzhee, you will be rewarded a warm, quiet, roomy shelter made of 100% recyclable material, where your breath will not condense on your clothes and equipment.
If a snow wall is constructed of cut snow blocks, it sinks very quickly, and the wall becomes loose. However, if the wall is constructed by packing loose snow the sinking process is much slower. Loose snow packed into small volume sinters were hard and durable. The same phenomenon can be observed when a snow-blower throws soft powder snow onto tree trunks and walls. Soft snow transforms into hard almost instantly.
The ICEBOX® is a must try
Several years ago Ed Huesers, an avid winter camper living in Colorado, began to develop his favourite camping site. He had slept under a cliff, and he started to experiment with different snow wall constructions. Ed had his own plastic shop, so he started to try different plastic forms to build the snow wall. Then he wanted to build a snow shelter in another place. That’s when the idea of an igloo-shaped snow shelter was born. The development took several years, but a couple of years ago Ed Huesers was able to start marketing his ICEBOX® igloo form. The ICEBOX® website (www.grandshelters.com) promises a lot:
“Rewriting the books of winter camping! The tool is lightweight (2,2kg), it can be easily packed on top of a backpack as a box measuring 65x36x8 cm, igloos can be made in any snow conditions in 1,5 to 3 hours without sweat, wet clothes or fatigue. With the tool one can build every time a perfect, self-supporting vault-formed extremely stable and spacious igloo, if there only is 6 inches of snow on ground. The igloo will last through the winter season. The form costs less than a tent…”
After reading this far I knew that I must find out whether even half of the promises would hold true. So I ordered the gadget from Ed via Internet. Paid with credit card 149 US$ and some 49 Euros for Finnish customs, I received a box of plastic parts and aluminium tubes with holes, an English illustrated Manual of 20 pages and an instruction video cassette of European standard.
In the autumn evenings I read through the Manual, watched the video and assembled and disassembled the igloo form a couple of times. The plastic gave a rather flimsy appearance, but the Manual told it to endure a fall full of snow even in -34 degrees C temperatures. My greatest scepticism, however, was towards the claim that even in subzero temperatures the running soft snow packed into the mold would just by itself transform into durable wall material.
Terraced Maya pyramid?
Then at the end of November we finally got the first snow on the grassy football field next to my home, and I decided to give ICEBOX® a try in earnest.
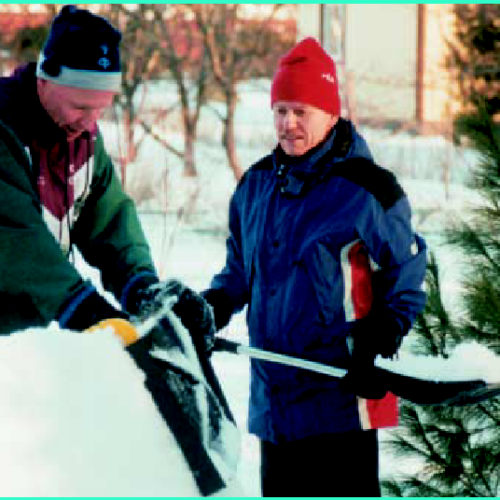
“The Manual states that it would be easiest to build the igloo with one or two friends, but of course just at that moment, nobody had the time or was interested. So I just grabbed a snow shovel, igloo form, Instruction Manual and a flashlight, and marched into the darkness.”
Getting Started!
The Manual states that it would be easiest to build the igloo with one or two friends, but of course just at that moment, nobody had the time or was interested. So I just grabbed a snow shovel, igloo form, Instruction Manual and a flashlight, and marched into the darkness.
The ground was not frozen, so I could push the stake easily among the grass. Assembling the pole of three pieces of aluminium tubing went also without any major problems, with the help of the Manual. The socket pole snapped to one end, and the toggle system to the other. The assembled pole locked onto the stake, and pole length adjusted for 1st layer. Then it is time to get at the box itself. The end panel snapped easily onto the outer panel posts, and the inner panel just as easily onto the end panel. Then it was only to put the U-bar onto the “free” end of the box, and snap the box onto the toggle ball joint. So simple!
Then I started the building for real, one or two shovels of snow a time into the form, packing it down carefully in between. The snow was new and a couple of degrees below freezing. It assumed the shape of the box form very easily, and in no time I was marvelling at the neat blocks. The beginning was easy. Blocks, 20 cm thick, 50 cm long and 30cm tall, were born easily as sand cakes on beach. When one block is ready, the U-bar is lifted up, and this lets the side panels separate a little. The pole is shortened with the help of the toggle a couple of cm, and the box can be easily slid off the block. The pole made sure that the blocks were left in a beautiful circle.
The first three blocks I left – just as the Manual said – lower, to form a ramp for the form to climb up onto the second layer after completion of the first round. Then I ran into a minor problem. In spite of all my reading and rehearsing, I had not realised that the first layer blocks must not stand straight on the ground, but to lean inwards in about 20o angle. This was necessary for the second layer to sit correctly on the first.
Now the bottom part of the second layer had to “reach” too far out, meaning that the block was built into too much of a leaning position. This again resulted that the third layer became too straight! My great igloo began to resemble ancient Maya terraced pyramids! Luckily it was dark and nobody was watching. Well, I got the wall up anyway, almost to the shoulder level. Then I stopped for the night. Next morning I worked for another hour to get to the sixth layer of blocks. That is when the problems of a beginner and solo builder began.
The outer panel of the form needed to be taken away, to be able to put snow into it. This made the form very unsteady; it did not lean nicely on the previous wall block, but tended to swing aside and dump the snow on the floor. Slowly I scraped the snow from the floor with one hand and held the form stable with another, and very carefully proceeded into packing the snow against the previous block. Anyhow, I was amazed how well even these blocks stayed up and little by little the wall arched into ceiling, and I could close the last hole and finish the igloo.
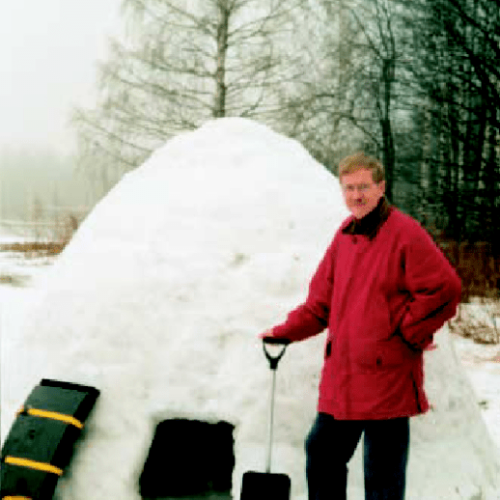
Boy, was I proud! First-timer, single-handedly and partly in dark I had built a convincing-looking igloo in less than five hours.
Next morning saw the weather change into rain, and my “minor” problem in the beginning grew into a major one: the wall was really not a smooth catenary vault structure, but instead it did have these regular bends in and out. My igloo could not take the weight added by the rain, and after only two days it collapsed to the ground.