Igloo Site Selection

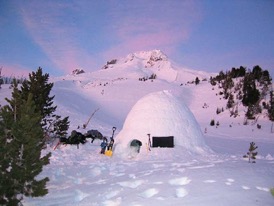
The easiest place to build your igloo is a flat open area with a snow depth around 2½ to 3ft. That snow depth will help prevent damage to underlying vegetation and provide plenty of snow to build the igloo.

If the snow is less than 2 ft. deep, you may want to pile some of the surrounding snow onto the platform in order to have a platform that is 12 to 18 inches deep so that you can later cut out a trench. This way you can sit without being cross-legged and stand fully upright if desired.

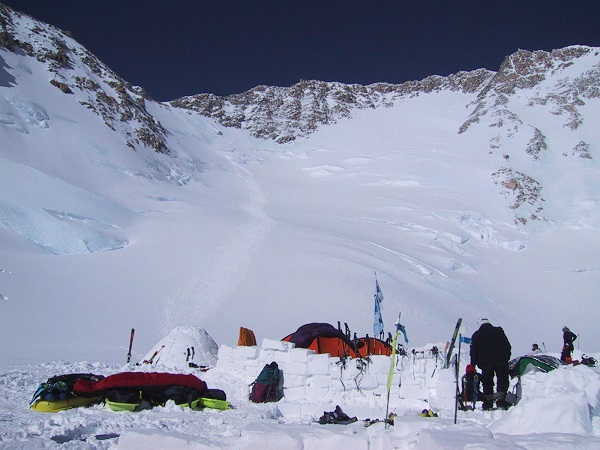
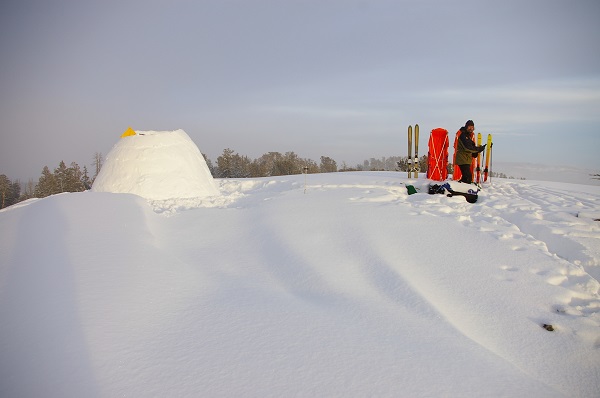
The igloo likes shade from 10:00 am to 2:00 pm. A spot with trees is better than in the shade of a mountain for being able to enjoy the sun. If you are above the trees, it doesn’t matter so much as it is colder up there but the sun will still have some influence on the igloo. Building in the trees does stop some of the sublimation of the igloo from being out of the wind. Drifting snow can bury the igloo quickly in the wrong spot and it doesn’t drift in the trees. The trees will take away the chance for a room with a view though so higher is what Igloo Ed prefers.

It is easiest to pack down a platform with skis or snowshoes, but your igloo will last longer if you pack with your boots and bust down through the snow as deep as possible and then pack your way up and out of the snow.

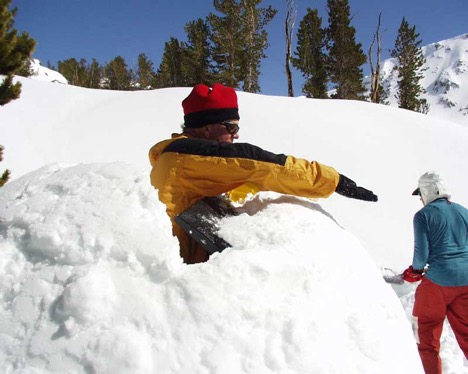
Pack a level area three feet in diameter bigger than the igloo size you are building. This is large enough to leave a 10 inch ledge around the outside of the igloo that you will need for standing on when working on the higher levels of the igloo. This ledge is critical and is easily taken away by the shoveler when picking up snow while building the igloo.

While packing the platform, keep in mind that it’s important that you make the center of the platform solid so that the stake will not shift once you’ve planted it. It is best if you pack the center of the platform as early as possible giving the snow more time to sinter and become solid. Pack the stake area by stomping as deep as you can in the center of the platform and start packing your way up and out of the hole you have stomped. It is also best if you avoid walking on this area as you are leveling and packing the platform and assembling the ICEBOX® so you don’t fracture the area.

Although a flat area is easiest for building the igloo, you may choose to build someplace with a slope so the door can come out below the igloo and not be down in a hole. It is energy saving to have the door below the igloo and not have a hole to climb out of when exiting the igloo. If you go this route, build on a flat area that has a drop off along it. If there is no flat area with an accompanying slope along it, build on a slant. Keep in mind that it takes considerably more energy to build the platform and the igloo when on a slope but a lot of the energy is gained back because of the ease of exiting the igloo and the ease of shoveling off the walk.

When building where the site is sloped, pack the downhill side of the platform first. One person should keep walking along the downhill edge while a shoveler moves snow from the high side and down into the packer’s footsteps. It also saves a lot of energy if you push the snow whenever possible instead of lifting and throwing the snow.

If you do build on a flat area and you have steps going down into a trench, keep in mind that if you are in the wind, your trench will fill with snow and be difficult to dig out. A short level trench that comes out the side of a slope is much easier to remove snow from.

Venting Your Igloo

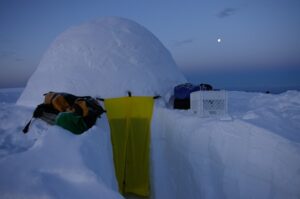
If you are going to run a stove or lantern in the igloo, you will want to have a vent so you get an exchange of air to lessen the chance of carbon monoxide poisoning. If there is a chance of your door drifting shut through the night, a vent should also be used to lessen the chance of suffocation.

The vent will melt bigger with time and will need to be plugged and opened again so it is not too large. If the vent gets as big as a baseball, your heat will escape and you will feel a cold draft coming in the door. 

Igloo Ed ran some tests using a carbon monoxide meter and found the following: with an ISO-butane lantern and stove burning on simmer, the CO level was below 5 ppm and with the stove on a high heat setting, they saw a CO level of 15 ppm. When running a stove on simmer and using Coleman fuel, they had readings of 22 ppm but didn’t test for CO with the stove on a high heat setting. They had readings of 125 ppm when they primed the Coleman fuel stove inside the igloo and advise anyone using any stove that requires priming to prime it outside the igloo. This text is copied from an OSHA document pointing out these levels labeled as hazardous: The Occupational Safety and Health Administration (OSHA) standard for exposure to carbon monoxide prohibits workers’ exposure to more than 35 parts of the gas per million parts of air (ppm), averaged over an 8-hour workday. There is also a ceiling limit of 200 ppm (as measured over a 15-minute period).

Vent location

Generally speaking, it is best to poke the vent above the door or trench. The main concern is getting snow on your gear when working on the vent. Poking the hole at top dead center puts it above the trench in all but the 7 foot igloo. In the 7 foot igloo, create the vent down the wall a little above eye level but still over the short door pit.

The air in the vent travels about 5 mph which is fast enough to blow falling snow away from the vent and keep it open. Snow actually collects on the windward side of the hole and blows away/melts on the leeward side of the igloo creating an angled vent hole. 

A concern with vents on the side(s) of the igloo is the vent getting plugged with fresh falling snow.  If the vent was on the side of the igloo, there is a chance that it would be where a drift collects on the igloo and it might overwhelm the air flow and plug the vent. That might be a reason to use two vents (one on each side) if you prefer the side vs the top, as snow would only form a drift on the leeward side of the igloo leaving the other vent open.

Snow could potentially blow into the igloo if the vent was on the windward side of the igloo and the wind was stronger than the air pressure inside the igloo due to heat rising.

The size of the vent controls the amount of air exchange one gets, not the number of vents.

General Solo Igloo Building Techniques

When starting to build a solo igloo with the ICEBOX Igloo Tool, set the form in position and get it to set at the proper square to floor angle. Then put enough snow into the form to build the entire 1/3 block of the first block of the ramp.

After placing enough snow into the form, position the form correctly and pack the snow. Pack the snow by putting your hand down through the snow and pack it to the floor below. Continue packing while packing your way up and out of the loose snow.

Position the form for the second block of the ramp, you will notice that the form stays put a bit better when positioned on the previous block.

Put enough snow into the form to build the second block of the ramp and again put your hand down through the snow and pack your way up and out of the snow. Depending on snow conditions, you may need to add a little bit of snow to complete the block.

Position the form for the third block of the ramp and fill the form full with loose snow and again go down into the loose snow and pack up and out. You will need to add more snow to finish the third block.

The reason for putting as much snow as possible into the form before packing is for speed but more importantly to keep your hands drier. If you pack just a little bit and handle the shovel again, the snow on your glove melts when holding onto the shovel handle eventually leading to the shovel handle icing up and your glove getting wet.

For the first couple blocks of the ramp, the form moves around pretty easily and it is best to pack them from the inside of the igloo. The third block of the ramp is a bit more steady because it is positioned on the 2/3 end of the second block and it can be packed from the outside. The rest of the blocks of the first and second layer can be packed from the outside and the form can be released and positioned from the outside as well.

On the third layer it depends how tall you are as to whether or not you can pack and position from the outside.

If need be, you step over the wall to pack and move the form.

On the fourth layer, the Outer Panel is removed and the packing can be done again from the outside.
In order to place and pack snow with the Outer Panel removed, put your right hand on the top of the Inner Panel close to the End Panel and push slightly in and down on that corner of the Inner Panel.

While holding this pressure, use your left hand to pick up one shovel of snow and place it in the form. Spread this snow out so it packs into the corner or crack all along the Inner Panel on the lower layer and the last block.

After this is packed the pressure on the right hand can be released and the form will stay put.

Pick up another shovel of snow and again place the pressure on the form again before dumping the snow into the form. Pack the snow into the rear corner of the form and build out from there. Once the block is built far enough out that it has crossed the center of the pole, the form will stay put without the pressure on the corner of the form.

To move the form, jiggle the form a bit until it comes loose and then move and position it again. There is no need to release the Toggle Handle if the form is slanted a bit so it comes loose when moved ahead.

The door will need to be opened up in order to change the length of the pole for each layer but that should be the only reason to go into the igloo until building the last block of the igloo.

For the last block, go into the igloo and position the form so it is held in place with a little pressure.

Go outside and pack the last block and your igloo is finished.

The door is dug to full depth into the igloo but the door pit is stopped short of the center of the igloo so a person can sleep broadside to the door. Once the door pit is dug, a small trench can be dug off to the side to give the chair sitting position.

Winter Backpacking

WINTER BACKPACKING USING AN IGLOO TOOL VERSUS PACKING IN AND SETTING UP A WINTER TENT

Sure, anyone winter backpacking can throw up a winter tent. They can also build a Quinzee or snow cave. Setting up large all weather tents, extreme tents, winter tents or snow tents are fine for some conditions, but they are certainly not a winter backpacking tent. They are often heavy and time consuming to set up. Not to mention these tents are often cold, noisy because they flap in the wind and can be pushed down with large amounts of overnight snowfall. Truthfully, even the best winter tent is going to be cold and uncomfortable.

Winter backpacking should be fun. Part of it being fun means it is safe and reasonably comfortable. You don’t want to freeze and cause yourself grief. There is also the peacefulness of winter camping in an igloo that cannot be duplicated. There is a visceral component to spending the night in an ancient snow habitat.Not to mention that the experience is unique in that it is very quiet and calm. The wind can be howling and you are safe and secure inside a dome of silence and calm.

Snow Camping

Don’t Let your Fear of the Cold Keep You From the Snow

Although the fear of the cold is enough to make most people stay inside their houses warm and cozy, these days, there seems to be a renewed interest in snow camping. Although it takes a while to convince first-timers to get out in the cold, snow camping—including igloo making—is one of the most exciting and worthwhile experience to add to your bucket list.

Why Camp in the Winter?

One of the biggest reasons for camping in the cold is experiencing nature at its most harsh and brutal. If you stand up to the challenge and brave the hard winter night in the wilds, it can be an exhilarating and life-altering experience.
Another great reason is the low cost of campsites, many of which are free during the snowy season. Additionally, you do not have to fight the crowds.
Isn’t Winter Camping Dangerous?
One major reason why people don’t enjoy camping in winters is the bitterly cold weather. Unlike animals, our bodies do not have natural wool or blubber to insulate us from the cold in sub-zero temperatures. Therefore, we run the risk of hypothermia if we are exposed to the elements. However, with a bit of preparation, snow camping can be just as fun, comfortable and exciting as summer camping.
…Which brings us to the tools.
Technology has improved a great deal since when Eskimos used to make igloos. The tools these days are much lighter which makes them easier to pack and haul. However, the cost of snow camping tools can be prohibitive for many who do not have the appropriate equipment already or are trying snow camping for the first time.
That’s not the case with the ICEBOX® igloo maker.
This innovative equipment makes a very merry-looking igloo in just two to three hours and weighs and cost much less than a four-season tent.

What Is The ICEBOX® Igloo Maker?

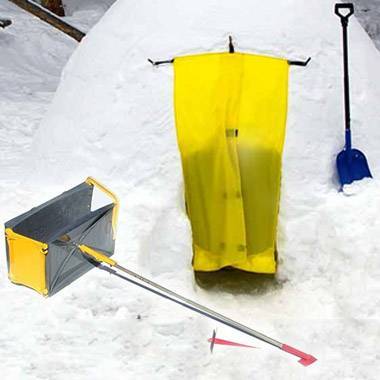
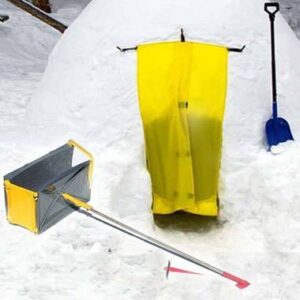
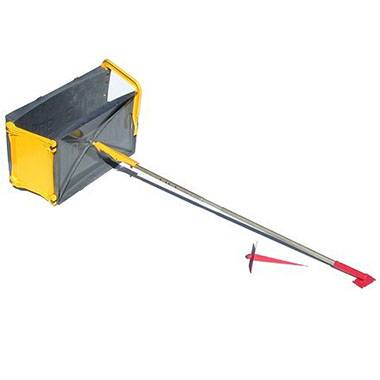
The ICEBOX® igloo maker is basically a plastic device for building the best kind of snow shelters — igloos. It consists of four plastic panels and an adjustable aluminum rod that comes with a spike. Instead of cutting out blocks of snow, the ICEBOX® igloo maker lets you pack snow into the mold to make your bricks. The rod is anchored to the center of the igloo and rotated on its axis to form layers of uniform, tightly-packed snow bricks. Its biggest advantage is that it can use any type of snow to form an igloo. This means you do not have to go to the added hassle of digging deep into the snow to get to the denser snow beneath. The ICEBOX® igloo maker can do the trick for you.
The ICEBOX® igloo maker weighs about 2.2 kg, which is about the weight of a single-person tent. But since a group of people can share the igloo, the equipment weight is lighter, collectively. At just $189.95, the ICEBOX® igloo maker costs less than half the amount of some four-season tents.
Why an Igloo?
There can be no doubt in the mind of those who love the ice and snow that an igloo is far superior to a tent. They are immune to the stiffest wind, are much warmer, and can be made much bigger than a tent.
Additionally, there is an excitement factor in spending the night in an igloo as well. What makes igloos so amazing is the wonderful and profound silence produced by the snow. All sounds are completely hushed and you can snuggle into your bed for a well-deserved rest.
Unlike tents, igloos also retain body heat or the heat of whatever you choose to light inside the igloo. As a result, you wake up with toasty warm toes — even when there has been snowfall outside!

The ICEBOX® Igloo Maker Gives You License to Chill

There is a reason why winter camping is fast becoming a favorite activity. It is fun, less expensive (but more exciting), and you will have experiences that summer campers never have. Next time you think about taking your family to an outdoor camping trip, check the igloo making box as well. That will give you some great pictures for Instagram.

Igloos Make the Best Winter Tent

WHY ICEBOX® IGLOOS MAKE THE BEST WINTER TENT FOR BACKCOUNTRY OR BACKYARD WINTER CAMPING

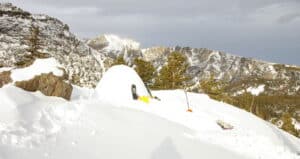
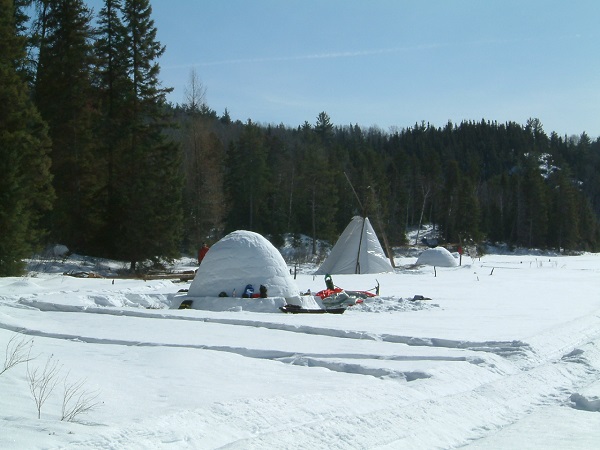
Igloo in the mountains

You may already know the advantages of snow camping but if not, you may be missing an exhilarating and visceral experience. No noise, no crowds, the incredible beauty of the winter landscape, and the peace and serenity of nature are nearly overwhelming.

At first, many people scoff at the idea of spending a night camping in an igloo. It might seem like a far-fetched, outdated idea. However, with a little research we learn that there is a very good reason why the Inuit have been building them for centuries. It’s not because they didn’t have any other options. It’s because igloos are actually the best option for a warm, winter shelter! Far better in fact than any snow tent you can find. Plus, there is really nothing quite like camping in an igloo in a picturesque winter landscape.

These facts were recognized by Ed Huesers (Igloo Ed) in 1975 when he moved to Colorado. Years of winter camping had taught him that real snow shelters were warmer, stronger, and quieter than other tents designed for winter snow camping. However, since snow caves could only be built in places with deep snow, his choices for snow shelters were limited.

That’s when he thought of building an igloo and created the ICEBOX® Igloo Tool. The ICEBOX® Igloo Block Building Tool gives a new and fun way to experience winter camping. Since igloo camping is rooted in ancient traditional winter lifestyles, just the nostalgia alone can make it a fun winter snow adventure whether you are building a primary shelter for backcountry winter camping with friends or using it as an awesome toy for backyard snow camping fun with your kids.

The ICEBOX® igloo maker weighs just 2.3 kg, which is much lighter than a 4-season tent. Since one ICEBOX® igloo maker can create a shelter that houses multiple people, it actually helps save weight while traveling.

Backpacking with the tool is simple because of the packable design and the supplied straps and buckles. It’s also a fraction of the cost of a winter tent. Enjoy quiet, peaceful camping with no flapping in the wind like a tent. Read on for more reasons why we think an igloo made with the ICEBOX® is the best winter camping shelter.

Igloos Make the Best Winter Tent: 4 Reasons Why

Stable Structure: Unlike winter tents that flap around and may even be blown away by strong winds: igloos don’t budge or become uprooted. That’s because they are supported by a stable catenary curve. This ensures that the blocks of snow do not collapse in on themselves. In fact, Igloo Ed is so confident in their strength, that he claims that igloos made with the ICEBOX® igloo maker are strong enough to support the weight of three people! Even though building an igloo takes longer than setting up a winter tent, it lasts much longer too. An igloo built out in the open can last for several weeks. An igloo built near the shelter of the trees, away from direct sunlight, can last for an entire season.

Warmth: Tightly packed snow is filled with air. This trapped air serves as a great insulator and is definitely not something a winter tent can do. It’s true! Igloos are warmer than tents! Want to know more? Check out this fun video that explains the science behind how an igloo keeps you warm. The inside of an igloo can reach as high as 40 degrees, sometimes even more. Compared to this, winter tents are only 10 degrees warmer than the outside temperature. Not to mention how the temperature drops if you open the flap and the cold air rushes in!

Quiet: Snow is a great insulator. Not only does snow preserve heat, it also absorbs sound. This means you won’t be bothered by the sounds of tents flapping in howling winds while backcountry camping, or the hustle of traffic if you’re camping in your backyard. Noises are all hushed inside the cozy abode of an igloo.

Space: Since an igloo is shaped like a dome, it has more space than many winter tents to stow your gear. It can also pack in more people than a tent can. The ICEBOX™ igloo maker is capable of creating an overnight winter shelter for a large group of people in just 1.5 to 3 hours (for experienced builders in ideal snow conditions). The ICEBOX® igloo maker can make igloos of varying sizes with the help of an adjustable pole, which can give you a maximum space of 95 square feet. For added comfort, dig a trough across the igloo to allow you to sit with your legs hanging instead of cross-legged style. An igloo is also big enough for a person to stand up and stretch. Another feature that many tents don’t have!

There are so many practical reasons to opt for an igloo rather than a winter tent. Stability, warmth and extra space are all logical choices to do so. Plus the sense of adventure and survival that come with camping in an igloo. It’s knowing that you have created shelter for yourself and your group with your own hands. It’s the confidence of being able to survive in the wilderness, no matter what Mother Nature throws at you. The ICEBOX® Igloo Tool assures setting up a winter base camp is easy and durable in any weather. Great for snowshoeing, backcountry skiing, camping in the snow or snow fort fun in the backyard with family. Winter camping in an igloo is just plain fun.

Replace your Cold Winter Tents and Build an Igloo Instead

BUILDING AN IGLOO

An igloo is warmer than a winter tent and a fun project to learn – they will replace your favorite winter tent! Igloos are reliable and warmer than a large all weather tent.

ICEBOX® Igloo Tool | Backpacking | Extreme Tent Camping

Advantages of an igloo vs snow caves, quinzees or winter tents

ADVANTAGES OF BUILDING AN ICEBOX® IGLOO VERSUS A SNOW CAVE OR QUINZEE

Years of winter camping taught Igloo Ed that real snow shelters are warmer, stronger, and quieter than tents designed for winter snow camping. However, since snow caves could only be built in places with deep snow, his choices for snow shelters were limited.

That’s when he thought of building an igloo and created the ICEBOX® Igloo Tool. 


Building an igloo with the ICEBOX® Igloo Tool makes the process easier than making snow caves or quinzees in snow country. The three most beneficial aspects of building igloos using the ICEBOX® Igloo Tool over the dogged shoveling involved with building snow caves are work, work, and work. It takes 50% or less time and effort using the ICEBOX® to build a snow shelter. Plus, an igloo can be left in place for the winter camping season. It is much easier to find when you want to return during the season making it much less resource and physically taxing to set up your season-long winter camp.

Don’t Bust Your Hump Building A Snow Shelter

The effort required to build snow caves or quinzees expends calories causing fatigue and sweat. While a person’s internal body temperature heats up from the exertion inside a cave or quinzee, external skin gets cold and damp from the wetness of sweat and melting snow. This moisture easily soaks into gloves and coats making the cold unbearable. People digging out a snow cave quickly become uncomfortable and tired. Maybe even close to hypothermia as they fluctuate back and forth between being hot from digging to standing around and freezing while taking a breather. A good thing to do in this situation is to wear Gore-Tex clothing and take care to stay as dry as possible.

With snow flying and dripping, you are going to get wet, So a better thing to do is to avoid this situation altogether. Enter the ICEBOX®. Building the ICEBOX® igloo takes less time, less energy, and you won’t be fatigued when you’re done. Indeed, you’ll still have plenty of stamina (and probably daylight) left to organize the camp, cook, and set up your sleeping bags. The igloos make for a very enjoyable evening.

ICEBOX® igloo shelter blocks are built in sequence on the wall meaning you are only handling the snow once. The igloo blocks are built in place. The builder is able to kneel or stand rather than lying down or kneeling like a snow caver. Kneeling is only required for the first row.

When building an ICEBOX® igloo for snow camping or as a snow shelter, you’ll be outside the entire time, until the very last block. Your body heat is cooled by the outside temperature and stays cool while falling snow isn’t melting onto the top of your head. So your winter camping trip doesn’t become winter survival, buy an ICEBOX® Tool, it’s the cooler way.

Igloos Are Physically and Environmentally Friendly

Prime real estate is not always easy to come by when scouting out a spot for a snow cave. The snow isn’t always deep enough and drifts aren’t always in the most desirable of places. Snow caves built into drifts are smack dab in the middle of nature’s vengeful path. The word “drift” brings up images of wind, and that wind isn’t going to cease just because there’s a new hole in the snow. The wind will still blow, will seek entrance into your snow cave sanctuary, and has predetermined that where you decided to make your home for awhile is where it will continue to stack up more snow and attempt to bury you and your efforts.

Picking Your Spot

Do the words winter survival come to mind? Snow cave doors and vent holes will also pile up with new snow, snow will continue to invade and penetrate, and you’ll probably get all grouchy again. But not as grouchy as if some unsuspecting passerby or fellow camper walks over the top of your snow cave and, quite literally, drops in on you. Not so with an ICEBOX® igloo. It’s above ground, wherever you want to put it, and highly visible. So pick yourself some prime real estate. A nice calm spot. A sunny exposure. A scenic view. Freedom of choice, yet another ICEBOX® advantage.

See The Light

Snow caves can become like an earthly black hole, blocking available light and zapping your energy, making you feel like a human collapsing star. Inside an ICEBOX® igloo, you’ll see the light. The snow used to fill the ICEBOX® Tool, whatever type, is re-mixed, making it airtight and creating a strong bond. It’s brighter inside because the igloo walls are thinner, allowing light through, in contrast to the snow cave’s black hole effect. Even full moonlight can penetrate an ICEBOX® igloo. The benefit of this additional light is a saving of valuable candle and flashlight resources. It’s warmer, too, because with the airtight bond, cold air doesn’t seep through the snow crystals like it would in a snow cave. You won’t have to sleep with your water bottle as your bed mate to prevent it from freezing. See the light. Feel the warmth. Fill the ICEBOX®

Winter camping should be fun. Part of it being fun means it is safe and reasonably comfortable. You don’t want to freeze and cause yourself grief. There is also the peacefulness of winter camping in an igloo that cannot be duplicated. There is a visceral component to spending the night in an ancient snow habitat. Not to mention that the experience is unique in that it is very quiet and calm. The wind can be howling and you are safe and secure inside a dome of silence and calm.

Winter Camping

LET’S GO WINTER CAMPING!

All right campers, let’s be honest here. Just because the weather changes and the rain begins to turn to snow, it doesn’t mean the outdoor fun has to end! There’s skating, skiing, snowshoeing, ice fishing and so much more that we can experience in winter months. However, it’s all about being properly prepared for the elements, so that we can enjoy our chosen activity.

The same is true for winter camping! Now, if you’ve only ever camped out in a tent under a summer sky, then you are missing out. Year-round camping is not only possible but it’s fun and it definitely labels you as a real hardcore adventurer! So, don’t let the snow send you indoors. Earn your rightful title as a tough outdoorsman by succeeding at subzero winter camping!

Sounds good, but how does one succeed at winter camping? At sleeping out in the snow all night long without succumbing to hypothermia? Well…the key is to sleep in an igloo! Did you know that when built correctly, igloos are immune to harsh wind, are much warmer than any tent on the market and can be made as big enough to accommodate large groups? Igloos retain body heat, are almost completely sound proof and can even support a campfire inside them! Just imagine building your own snow shelter and sleeping out in the wilderness in the middle of winter. Now that’s an exhilarating adventure for your bucket list!

So how is it done? How does one make an igloo that is safe, warm and architecturally sound?

We’ll let you in on our little secret…it’s called the ICEBOX® Igloo Maker and it’s been working its magic in some of the harshest conditions on our planet.

What Is The ICEBOX® Igloo Maker?

The ICEBOX® igloo maker is a plastic device that enables you to build a solid, secure and warm igloo. It consists of four plastic panels and an adjustable aluminum rod that comes with a spike. Instead of cutting out blocks of snow, the ICEBOX® igloo maker lets you pack snow into the mold to make your bricks. The rod is anchored to the center of the igloo and rotated on its axis to form layers of uniform, tightly-packed snow bricks. Its biggest advantage is that it can use any type of snow to form an igloo! No need for the back-breaking work of digging deep down into dense layers of snow. The ICEBOX® igloo maker makes it easy and does it right every time!

The ICEBOX® igloo maker weighs about 2.2 kg, which is about the weight of a single-person tent. This innovative equipment makes a perfect igloo in just two to three hours and can house large groups of people. Plus, at just $189.95; the ICEBOX® igloo maker costs less than half the amount of some four-season tents! Which, as we mentioned is not going to keep you warm anyway!

Once you have our ICEBOX® igloo maker then all you need to do is scout out the best location and follow the instructions. Want to learn more? Check out our article on How to Build an Igloo.

The ICEBOX® Igloo Maker Gives You License to Chill

So be ready when this winter comes rolling in. Not with a cabin or a tent but with the knowledge, skills and your very own ICEBOX® Igloo Maker. Take your adventuring to the next level as you build a snow shelter and show Mother Nature that you won’t be taken down in the snow!

Meet Igloo Ed and Start Building Your Own Igloo Today

Who is Igloo Ed?

Igloo Ed is the inventor of the ICEBOX® Igloo Tool and loves building Igloos. Ed is more than an enthusiast, he has made it a business. He loves to share his love of igloos and snow camping. His love has culminated in many years of real life testing and expertise in the art of building an igloo. Building an igloo is difficult without the right tools. Igloo Ed discovered this very early on and created the Igloo Tool and Door to fill that need.

What does Igloo Ed Love?

Igloo Ed has built hundreds of Igloos. He spends many hours working with others to sharer his passion. Ed spends an incredible amount of time hiking, skiing and just enjoying the outdoors, especially in Colorado where Igloo Ed lives. Although it may be near impossible to actually find him, Ed can often be found in the back country hiking around, camping out in Igloos and cross country skiing with friends.

Our Igloo Building Tool is a Patented Product

Ed has been selling the ICEBOX Igloo tool since 1998. He has seen thousands of people buy the igloo tool and build their first igloo. Since that time, Ed has seen his creation featured on the Today show. Yes, they built an igloo in the streets of New York City. Igloo Ed has remained focused on selling the product directly without the increased costs associated with some of the larger online retailers.

Ed and his entire team take pride in the fact that the ICEBOX® Igloo Tool has seen such success over the years, but he knows there are more people to reach. Grand Shelters, Ed’s parent comapny has invested in a more interactive and user friendly website experience. Ed hopes you find our new website more informational, mobile friendly and sort of fun.


Build Your Own Igloo with an ICEBOX® plastic Form.

“Rewriting the books of winter camping! The tool is lightweight (2,2kg), it can be easily packed on top of a backpack as a box measuring 65x36x8 cm, igloos can be made in any snow conditions in 1,5 to 3 hours without sweat, wet clothes or fatigue. With the tool one can build every time a perfect, self-supporting vault-formed extremely stable and spacious igloo, if there only is 6 inches of snow on ground. The igloo will last through the winter season. The form costs less than a tent…”

Build Your Own Igloo

Story by ERA Finland

If you build your own igloo, you can build a shelter in any condition. However, snow shelters have long been regarded as a piquant special delicacy of winter camping. If you happen to know or find a suitable snowbank for a snow cave, good solid snow for igloo building, or have enough energy to shovel up a big pile of snow for a quinzhee, you will be rewarded a warm, quiet, roomy shelter made of 100% recyclable material, where your breath will not condense on your clothes and equipment.

Unfortunately many winter trek destinations just do not have suitable drifts for snow caves, or hard-packed snow for sawing blocks for a real Inuit igloo. Many campers do not have the skill to build an igloo, and few are willing to toil for a quinzhee. Building a snow shelter is time-consuming hard work. Besides, one gets wet through sweating and of snow melting on knees, elbows, and neck. Thus a tent, being quick and easy to set up, is the standard shelter of a winter camper. Snow shelters are regarded merely as emergency solutions in case of storm or equipment failure.

Snow shelters have long been regarded as a piquant special delicacy of winter camping. If you happen to know or find a suitable snowbank for a snow cave, good solid snow for igloo building, or have enough energy to shovel up a big pile of snow for a quinzhee, you will be rewarded a warm, quiet, roomy shelter made of 100% recyclable material, where your breath will not condense on your clothes and equipment.

If a snow wall is constructed of cut snow blocks, it sinks very quickly, and the wall becomes loose. However, if the wall is constructed by packing loose snow the sinking process is much slower. Loose snow packed into small volume sinters were hard and durable. The same phenomenon can be observed when a snow-blower throws soft powder snow onto tree trunks and walls. Soft snow transforms into hard almost instantly.

The ICEBOX® is a must try

Several years ago Ed Huesers, an avid winter camper living in Colorado, began to develop his favourite camping site. He had slept under a cliff, and he started to experiment with different snow wall constructions. Ed had his own plastic shop, so he started to try different plastic forms to build the snow wall. Then he wanted to build a snow shelter in another place. That’s when the idea of an igloo-shaped snow shelter was born. The development took several years, but a couple of years ago Ed Huesers was able to start marketing his ICEBOX® igloo form. The ICEBOX® website (www.grandshelters.com) promises a lot:

“Rewriting the books of winter camping! The tool is lightweight (2,2kg), it can be easily packed on top of a backpack as a box measuring 65x36x8 cm, igloos can be made in any snow conditions in 1,5 to 3 hours without sweat, wet clothes or fatigue. With the tool one can build every time a perfect, self-supporting vault-formed extremely stable and spacious igloo, if there only is 6 inches of snow on ground. The igloo will last through the winter season. The form costs less than a tent…”

After reading this far I knew that I must find out whether even half of the promises would hold true. So I ordered the gadget from Ed via Internet. Paid with credit card 149 US$ and some 49 Euros for Finnish customs, I received a box of plastic parts and aluminium tubes with holes, an English illustrated Manual of 20 pages and an instruction video cassette of European standard.

In the autumn evenings I read through the Manual, watched the video and assembled and disassembled the igloo form a couple of times. The plastic gave a rather flimsy appearance, but the Manual told it to endure a fall full of snow even in -34 degrees C temperatures. My greatest scepticism, however, was towards the claim that even in subzero temperatures the running soft snow packed into the mold would just by itself transform into durable wall material.

Terraced Maya pyramid?

Then at the end of November we finally got the first snow on the grassy football field next to my home, and I decided to give ICEBOX® a try in earnest.

“The Manual states that it would be easiest to build the igloo with one or two friends, but of course just at that moment, nobody had the time or was interested. So I just grabbed a snow shovel, igloo form, Instruction Manual and a flashlight, and marched into the darkness.”

Getting Started!

The Manual states that it would be easiest to build the igloo with one or two friends, but of course just at that moment, nobody had the time or was interested. So I just grabbed a snow shovel, igloo form, Instruction Manual and a flashlight, and marched into the darkness.

The ground was not frozen, so I could push the stake easily among the grass. Assembling the pole of three pieces of aluminium tubing went also without any major problems, with the help of the Manual. The socket pole snapped to one end, and the toggle system to the other. The assembled pole locked onto the stake, and pole length adjusted for 1st layer. Then it is time to get at the box itself. The end panel snapped easily onto the outer panel posts, and the inner panel just as easily onto the end panel. Then it was only to put the U-bar onto the “free” end of the box, and snap the box onto the toggle ball joint. So simple!

Then I started the building for real, one or two shovels of snow a time into the form, packing it down carefully in between. The snow was new and a couple of degrees below freezing. It assumed the shape of the box form very easily, and in no time I was marvelling at the neat blocks. The beginning was easy. Blocks, 20 cm thick, 50 cm long and 30cm tall, were born easily as sand cakes on beach. When one block is ready, the U-bar is lifted up, and this lets the side panels separate a little. The pole is shortened with the help of the toggle a couple of cm, and the box can be easily slid off the block. The pole made sure that the blocks were left in a beautiful circle.

The first three blocks I left – just as the Manual said – lower, to form a ramp for the form to climb up onto the second layer after completion of the first round. Then I ran into a minor problem. In spite of all my reading and rehearsing, I had not realised that the first layer blocks must not stand straight on the ground, but to lean inwards in about 20o angle. This was necessary for the second layer to sit correctly on the first.

Now the bottom part of the second layer had to “reach” too far out, meaning that the block was built into too much of a leaning position. This again resulted that the third layer became too straight! My great igloo began to resemble ancient Maya terraced pyramids! Luckily it was dark and nobody was watching. Well, I got the wall up anyway, almost to the shoulder level. Then I stopped for the night. Next morning I worked for another hour to get to the sixth layer of blocks. That is when the problems of a beginner and solo builder began.

The outer panel of the form needed to be taken away, to be able to put snow into it. This made the form very unsteady; it did not lean nicely on the previous wall block, but tended to swing aside and dump the snow on the floor. Slowly I scraped the snow from the floor with one hand and held the form stable with another, and very carefully proceeded into packing the snow against the previous block. Anyhow, I was amazed how well even these blocks stayed up and little by little the wall arched into ceiling, and I could close the last hole and finish the igloo.

Boy, was I proud! First-timer, single-handedly and partly in dark I had built a convincing-looking igloo in less than five hours.

Next morning saw the weather change into rain, and my “minor” problem in the beginning grew into a major one: the wall was really not a smooth catenary vault structure, but instead it did have these regular bends in and out. My igloo could not take the weight added by the rain, and after only two days it collapsed to the ground.